|
Young Scientist Exhibition, RDS Dublin 12-01-2001 |
It is not often primary school children are asked to exhibit at a national exhibition, and for the twelve children who travelled to the RDS in Dublin on 12th January 2001, the experience will not be forgotten for a long, long time. The train journey from Ballina began at 06.50 and it was 22.10 before they arrived back on the same platform. The atmosphere in the RDS was new, exciting, and simply cool. Deirdre Butler, the project co-ordinator, was there too to help everybody. When we reached the RDS we rang her on the mobile to anounnce our arrival, only to hear a mobile a metre away go off .... she was right beside us! We also met Breeda Meleady, project officer with NCTE. We shared stands with some children from St. Brighid's N.S., Castleknock. We gave several demos throughout the afternoon, and to all age groups. We also had a great time looking at the other exhibits, and talking to the other project participants. Thanks to all the parents who travelled, and to Mr. Ed Gunning for giving us the loan of his laptop 
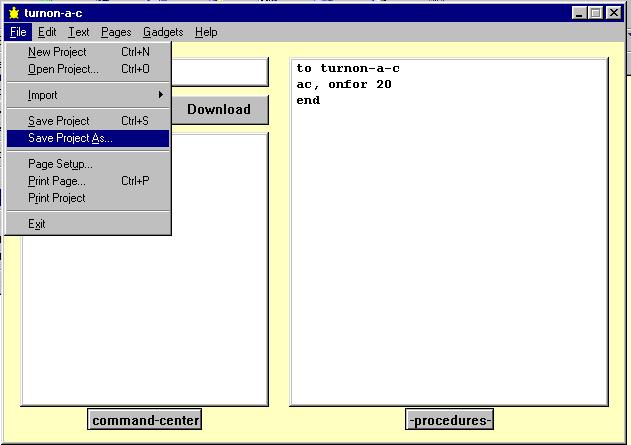
for our demos. Thanks to Dr. Fred G. Martin of MIT for showing us how to program in LOGO, and to LEGO DACTA also. A special thanks to Deirdre Butler and NCTE for sponsoring our visit, and to ESAT for sponsoring the Young Scientists' Exhibition, 2001. ANOTHER GREAT TIME AT ST. PAT'S, DRUMCONDRA The project work continued with enthusiasm, and we chose the legend of St. Patrick and Crom Dubh for the exhibition on 16th June in St. Patrick's College of Education, Drumcondra. This involved visiting some of the sites in the Ballina/Killala area, and then making, programming, and rebuilding several models, as well as some artwork, based on the story. We made lots of models and we took models of St. Patrick, Crom Dubh, Téideach's boat, Dún Briste, the Well of the Branch, the hounds Coinn Iotair and Saidhthe Suaraighe, the linnaun shee and her wheelless sliding cart as well as more bits and bobs. Leona and Denise addressed the group and told everybody what our project was about. They then thanked Deirdre Butler and the NCTE, Fred Martin as well as the parents and teachers who helped make the project a success. Dr. Pauric Travers, President of the College, then presented them with a beautiful plaque for the school, and each pupil received a certificate. Kirsty, Marie and Bryan stood at our stand with Denise and Leona and gave demonstrations. The walls and windows of the hall were covered in maps and artwork, as well as the story which came from the book, "The Stone of Truth and other Irish folk tales" by Douglas Hyde, ISBN 0 7165 2344 2. We all got a quick look at the great projects from the children in the other 12 schools, and it was a fantastic day. We look forward to doing the project again next year. Denise and Leona will have gone to Secondary School, but we will have a new second class. |
|
![]() THE RCX |
The RCX is a programmable LEGO brick. A free-roving robot can be built around the brick and this robot can be controlled by the brick. We can program the brick using the LEGO Mindstorms programming language, or using LOGO commands which can be sent to the brick from our PC. We used LOGO at the RDS, and St. Brighid's used LEGO |
![]() PC WITH TOWER ATTACHED "BEAMING" LOGO COMMANDS TO AN RCX |
The program for the RCX is written on a PC.
|
![]() THE RCX WITH MOTORS AND SENSORS ATTACHED |
AND SENSORS ATTACHED An RCX has 3-outputs and 3-inputs.
|
Note: For these tests you will need an RCX with motors and sensors attached as shown. |
![]() A TOUCH SENSOR |
Note the yellow button which is a push-button switch like that on a door-bell. Note that four of the six studs on top have electrical contacts. |
![]() |
What has happened? The RCX has read the "pressed" and "released" states and shown these as a low number and a high number. Because it shows just 2 numbers we call it a digital device. A robot could use this sensor to turn if it touches a wall. |
![]() A LIGHT SENSOR |
Note that the light sensor has a light transmitter and a light receiver to measure the light reflected back. A cable comes from the light sensor body to an electrical plate. |
![]() THE RCX WITH MOTORS AND SENSORS ATTACHED |
What has happened? The light sensor on the RCX has received different levels of light and the RCX has shown these as different numbers. Because the light sensor shows several different levels to the RCX we call it an analogue device. |
![]() THE ROTATE SENSOR |
The rotate sensor can be useful for telling the RCX, for example, how much a robotic arm has turned. The temperature sensor can tell, for example, if a motor is over-heating and the RCX can shut down everything. Both are analogue devices. |
![]() THE TEMPERATURE SENSOR |
Note: For this section you will need an RCX with motors and sensors attached, and a second RCX. You will also need a PC, a tower and the Yellow Brick Logo application. |
![]() THE YELLOW BRICK LOGO SCREEN To program the RCX, we open the Yellow Brick Logo application, and the Yellow Brick Logo screen above appears. We type our LOGO commands in the three white areas. We look at each of the white areas in the next sections. |
![]() YBL COMMAND CENTER |
Commands typed in the Yellow Brick Logo Command Center, followed by ENTER, go straight to the tower to be sent to the RCX. Place the RCX near the tower, with both tranceivers facing each other and attach motors as for previous tests. Turn on the RCX by pressing the red On-Off button, and try the commands shown below.
|
Type beep wait 10 beep wait 10 beep and press ENTER to hear the result. Try repeat 3[beep wait 10] and press ENTER. |
Press the On-Off button on the RCX to quit. |
![]() THE PROCEDURES WINDOW |
A LOGO procedure is a list of instructions written on
lines following a line beginning with to and
before a line with the word end on
its own.
to turnon-a-c
|
Note: to and end must be present in a procedure. We are teaching LOGO to do a task. Call it programming in LOGO, if you like. We can't teach it to off because it knows how to off already, but there are many other words it doesn't know, so we can have plenty of fun teaching it. |
to dance
a, onfor 10 b, onfor 10 rd dance end This procedure calls itself, so dance goes on and on and .... |
![]() THE RUN BUTTON LINE |
After a procedure is written, it can be downloaded to
the RCX by placing its name in the Run Button Line and clicking the Download
button.
|
![]() SAVING OUR PROGRAMS We can save procedures by going to File, Save Project As, and giving the procedure in the Procedures Window a name. To use these again we go to |
|
Write the following procedure and download it: a, on when [switch1] [rd] end Press Run
on the RCX, and the motor attached to output A turns on, and reverses
direction each time the yellow button of the touch sensor attached to input
1 is pressed. Press Run again to stop the
program running.
|
Write the following procedure, taking care with the spaces, and download it: if sensor2 > 750 [beep] see-it end Press Run on the RCX, hold the light sensor in your hand with its light beaming down on the RCX and see if the RCX detects whether it's over a yellow set of studs on the RCX or not. It should beep just like the scanner at the supermarket checkout, but if not, try changing the number 750 to a different number. This procedure is recursive, because in the third line, see-it calls itself. It will just keep testing sensor attached to input 2. |
Note: For this test you will need a second RCX. |
Get a second RCX, type the following program and download
it to the RCX, which we will call RCX2:
to tell-rcx
Now switch off RCX2, and write and download the program
on the right to the RCX we used previously with motors attached. We will
call it RCX1.
|
to listen-and-obey
loop [waituntil [newir?] if ir = 1 [beep] if ir = 2 [a, onfor 5] if ir = 3 [c, onfor 5]] end Turn on RCX1 and RCX2 and press Run on both. RCX2 creates random numbers between 1 and 3 each second and sends these to RCX1. If RCX1 hears 1, it beeps. If it hears 2 it turns on motor attached to output A for 5-tenths of a second. What if it hears 3? Yes, it turns motor C! |